How to Prepare a Room for Painting (So It Goes Smoothly)
Learn how do you prepare a room for painting, what supplies to use, how to clean and repair walls, and how to tape properly for clean edges.
Preparing the room for painting
If you’re wondering “how do you prepare a room for painting,” the short answer is: clear the space, protect everything you can’t paint, then get the walls clean and smooth. When the room is set up well, you spend less time fixing drips and missed spots. It also helps paint bond better and look even across the whole wall. Plan for a slower start, so the actual painting goes faster.
Start by protecting floors and furniture. You can either move items out or cover them completely with drop cloths. For large pieces you can’t move, cover them with overlapping cloth sections so overspray can’t reach upholstery or glossy finishes. Keep the room ventilated and have a clear path from the door to the work areas.

Gathering the supplies you’ll need
Before you open paint, pull together tools so you’re not stopping mid-project. For most interior painting, you’ll need a wall cleaner, a bucket, sponges or microfiber cloths, and cleaning rags. For wall fixes you’ll need a spackling compound or wall filler plus a putty knife. Also grab sandpaper or a sanding sponge for smoothing repairs.
For edges and trim, get painter’s tape in a width that matches your trim lines. Use a small plastic or metal scraper for lifting stubborn residue. Have a caulk tube on hand if you find small gaps where trim meets wall. Finally, keep extra trash bags and paper towels close so cleanup stays easy.
- Bucket and warm soapy water
- Wall cleaner (or your regular degreasing cleaner)
- Sponges, microfiber cloths, and rags
- Spackling compound and putty knife
- Sanding sponge or sandpaper
- Painter’s tape and a caulk tool (optional)
- Drop cloths for floors and furniture
As a quick rule, buy enough tape for full runs. It’s frustrating to find you need one more roll while the walls are already prepped.
Removing furniture and decor
Wall prep starts with clutter control. Clear out as much furniture as possible from the room or cover it with drop cloths and secure the edges so they don’t shift. Leaving a “work zone” of at least 3 feet wide makes it easier to reach without bumping the floor or knocking off tape later.
Do wall decor removal early. Take down pictures, hooks, shelves, and any items that block access to the wall. Remove light switch covers and outlet plates too. This prevents paint splatters inside the openings and keeps you from painting over dust and grime around the edges.
When you remove plates, set screws in a labeled small bag or container. You’ll thank yourself later when it’s time to put everything back. If you have cords, bundle them to one side so cloths don’t snag them.

Cleaning and inspecting the walls
Next, clean before you patch or tape. Dust and grime cause paint to skip or look uneven, especially on matte interior finishes. Use warm soapy water and wipe the whole wall, not just the spots you plan to paint. Work top to bottom so any drips or dirty water don’t streak across already cleaned areas.
After cleaning, let the walls dry fully. Then inspect under strong light, like a lamp held close to the surface. Look for tiny bumps, scuffs, and marks that won’t come off with soap. Also check corners, around trim, and near outlets where residue tends to build.
If you find greasy patches, clean again with a stronger degreasing option. For smoke-stained walls, you may need a stain-blocking primer before paint. For routine room refreshes, thorough cleaning usually fixes most adhesion and appearance issues.
Repairing wall imperfections for a smooth finish
Once the wall is clean, repair damage so your paint won’t highlight it. Inspect for cracks, holes, dents, and peeling edges. Use the right filler for the job: small pinholes and minor dents typically work well with spackling compound. Larger holes may need a more substantial wall filler.
Apply filler with a putty knife, pressing into the gap and smoothing the surface. Let it dry as directed by the product. Then sand the repaired spots lightly so the wall surface becomes even. If the repair rises or dips, paint will show it as a shadow line.
For cracks, consider whether the crack is active. A hairline crack that returns may need a different approach than simple patching. But for most interior painting preparation, careful patching and sanding makes a big visual difference.
- Patch holes and dents with spackling compound
- Feather edges so repairs blend into the surrounding wall
- Sand smooth after drying
- Wipe sanding dust off before painting

Applying painter’s tape for clean edges
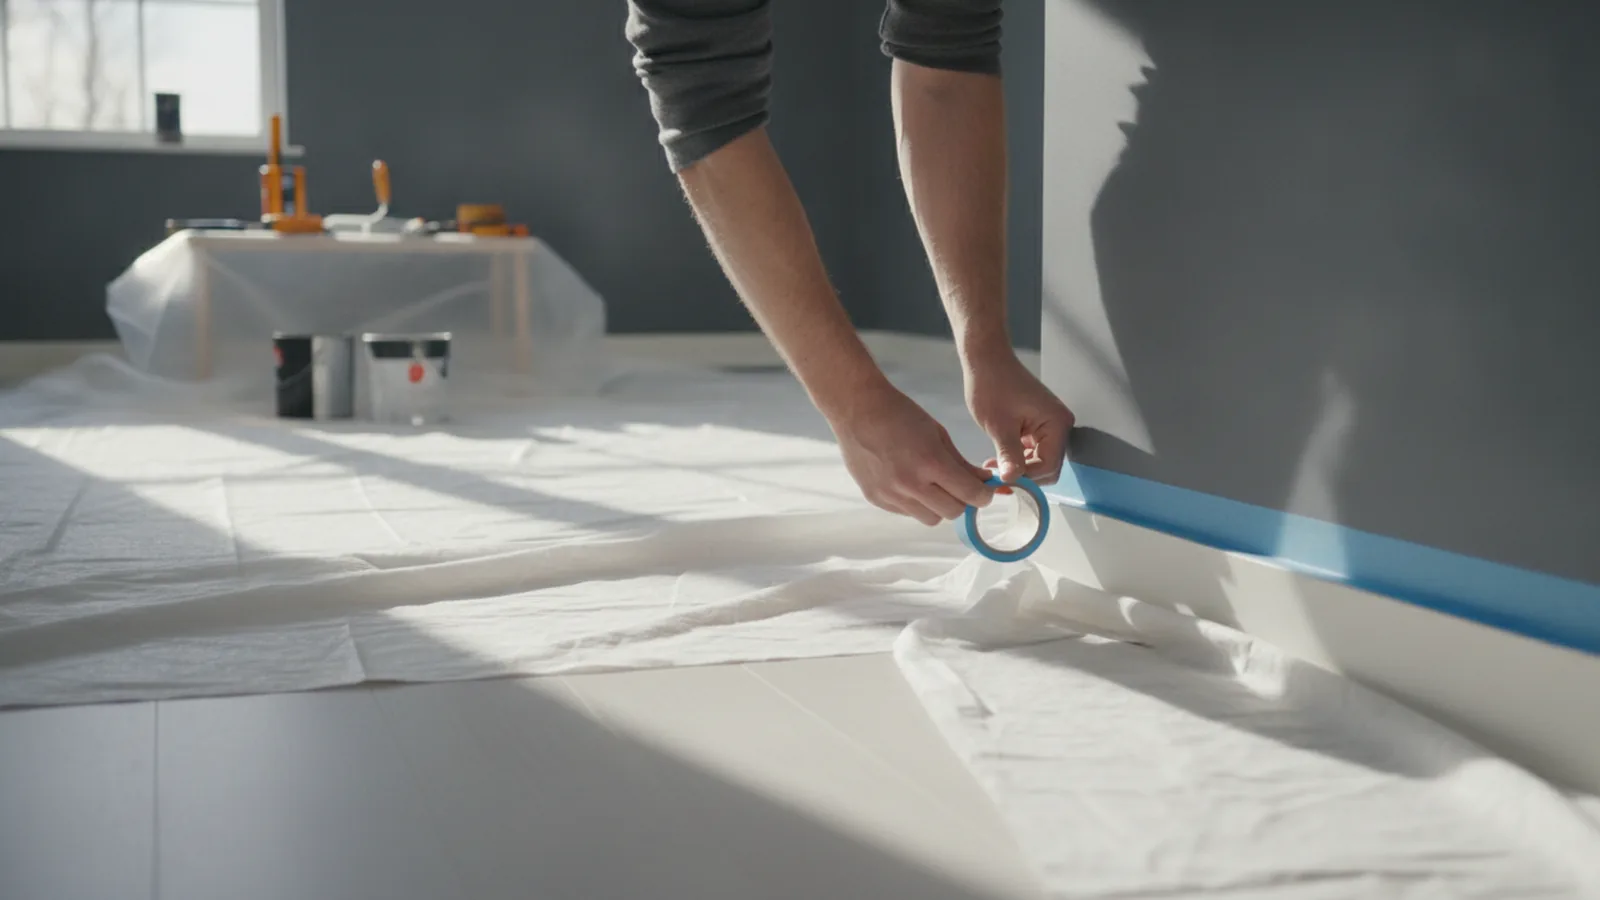
Now for the part most people overthink: “how do you prepare a room for painting” includes protecting edges with painter’s tape. Tape helps create crisp lines on trim, baseboards, and corners. If you’re learning “how to tape a room for painting,” focus on two things: surface contact and removal timing. The tape only works when it sticks firmly to the wall.
Press tape along the edge you want to protect. Use your fingertip or a plastic smoothing tool to seal the edge, especially where the wall meets textured drywall. If you skip this, paint can creep under the tape and leave a jagged line. For best results, keep the tape runs straight and avoid stretching it.
When you’re ready for “how to tape off a room for painting,” overlap tape at corners and change direction with care. Don’t pull tape too tight around outside corners. Light pressure is enough for adhesion.

How to tape off a room for painting vs spray painting
Taping for spray painting usually needs extra attention. Spray can push under edges even when brush painting stays clean. Use a wider tape, press it down firmly, and consider adding a plastic barrier at the floor line if overspray is likely. If you’re asking “how to tape off a room for spray painting,” treat edges like windbreaks, not just lines.
Also cover adjacent areas that aren’t being painted with additional cloth. Keep fans and airflow under control so airborne mist doesn’t drift onto areas you want untouched. Always follow your paint system instructions for drying times so tape removal doesn’t pull dried paint.
Final preparations before you start painting
Before the first coat, do a final walkthrough. Check that furniture is covered, floors are protected, and all wall decor removal is complete. Make sure outlets and switch covers are removed or fully protected. If you’re leaving outlets exposed, avoid getting paint in the openings by masking carefully around each plate area.
Confirm the walls are dust-free. After sanding, wipe the repaired areas with a damp cloth and let everything dry. Dust on the surface can ruin the look of smooth paint and can interfere with how paint levels. Then plan your paint order: cut in edges first, then roll or brush larger sections.
When tape is in place, avoid dragging tools through it. Set rollers and brushes down away from taped edges. When it’s time to remove tape, pull it slowly at an angle while paint is still in the recommended state. This is often the difference between a sharp line and a torn edge.
Finally, keep a small cleanup kit ready. Store paper towels, a small trash bag, and a damp cloth near your work area. That small step prevents small spills from turning into dried drips on the floor or trim.
Quick prep checklist you can follow on-site
Use this short sequence if you’re packing a room for the weekend or a single-day refresh. It keeps tasks in the right order, so you don’t have to re-do tape or repairs.
- Move furniture out or cover it with drop cloths
- Remove wall decor, switch covers, and outlet plates
- Clean walls with warm soapy water, then let them dry
- Repair cracks and holes with spackling compound
- Sand repairs and wipe off dust
- Apply painter’s tape and press edges firmly
- Protect floors and do a final room check
If you stick to this flow, you’ll avoid most “why does this line look messy?” problems. You’ll also get a smoother finish across the whole wall.
FAQ: how to prepare and tape a room for painting
How do you prepare a room for painting without making a mess? Cover floors with drop cloths, move furniture out when possible, and remove decor and plates early. Clean and repair walls first, then tape edges last. This order prevents re-taping after fixes.
How to tape a room for painting so the edge stays clean? Seal the tape edge by pressing it firmly along trim and corners. Don’t stretch the tape. Remove it at the right time so it doesn’t tear dried paint.
How do you tape off a room for painting when you have outlets? Remove outlet plates and mask around the opening if needed. Keep paint out of the openings to avoid cleanup later. Put plates back once everything is dry.
How to tape off a room for spray painting? Use wider tape, press it down well, and protect nearby areas with extra cloth or plastic barriers. Manage airflow so overspray doesn’t drift under edges. Remove tape carefully once paint is set enough to hold lines.
Do I need to sand before painting after I patch holes? Yes, for best results. Sanding helps repairs blend into the wall, so paint won’t show a raised ridge. Wipe away sanding dust before your first coat.
What should I clean walls with before painting? Warm soapy water works for normal dust and light grime. For greasy marks, use a degreasing wall cleaner. Let the wall dry fully before taping and painting.
FAQ
- How do you prepare a room for painting?
- Clear furniture or cover it with drop cloths. Clean walls with warm soapy water, then repair cracks and holes before taping edges.
- How to properly tape a room for painting?
- Apply painter’s tape along trim and press the edge down firmly. Keep tape straight, and remove it when paint is ready to hold a clean line.
- How to tape off a room for painting around outlets and switches?
- Remove outlet plates and switch covers to avoid paint splatters. Mask carefully around openings if needed, then reinstall plates after painting dries.
- How to tape off a room for spray painting?
- Use wider painter’s tape and press it down well. Add extra barriers with cloth or plastic where overspray can drift under edges.
- Do I need to sand repaired walls before painting?
- Yes. Sand after spackling compound or filler dries so repairs blend smoothly with the wall.