How to Build a Wet Room Bathroom: Design and Installation Guide
Build a waterproof wet room bathroom with proper slope, materials, and care.
Understanding Wet Rooms
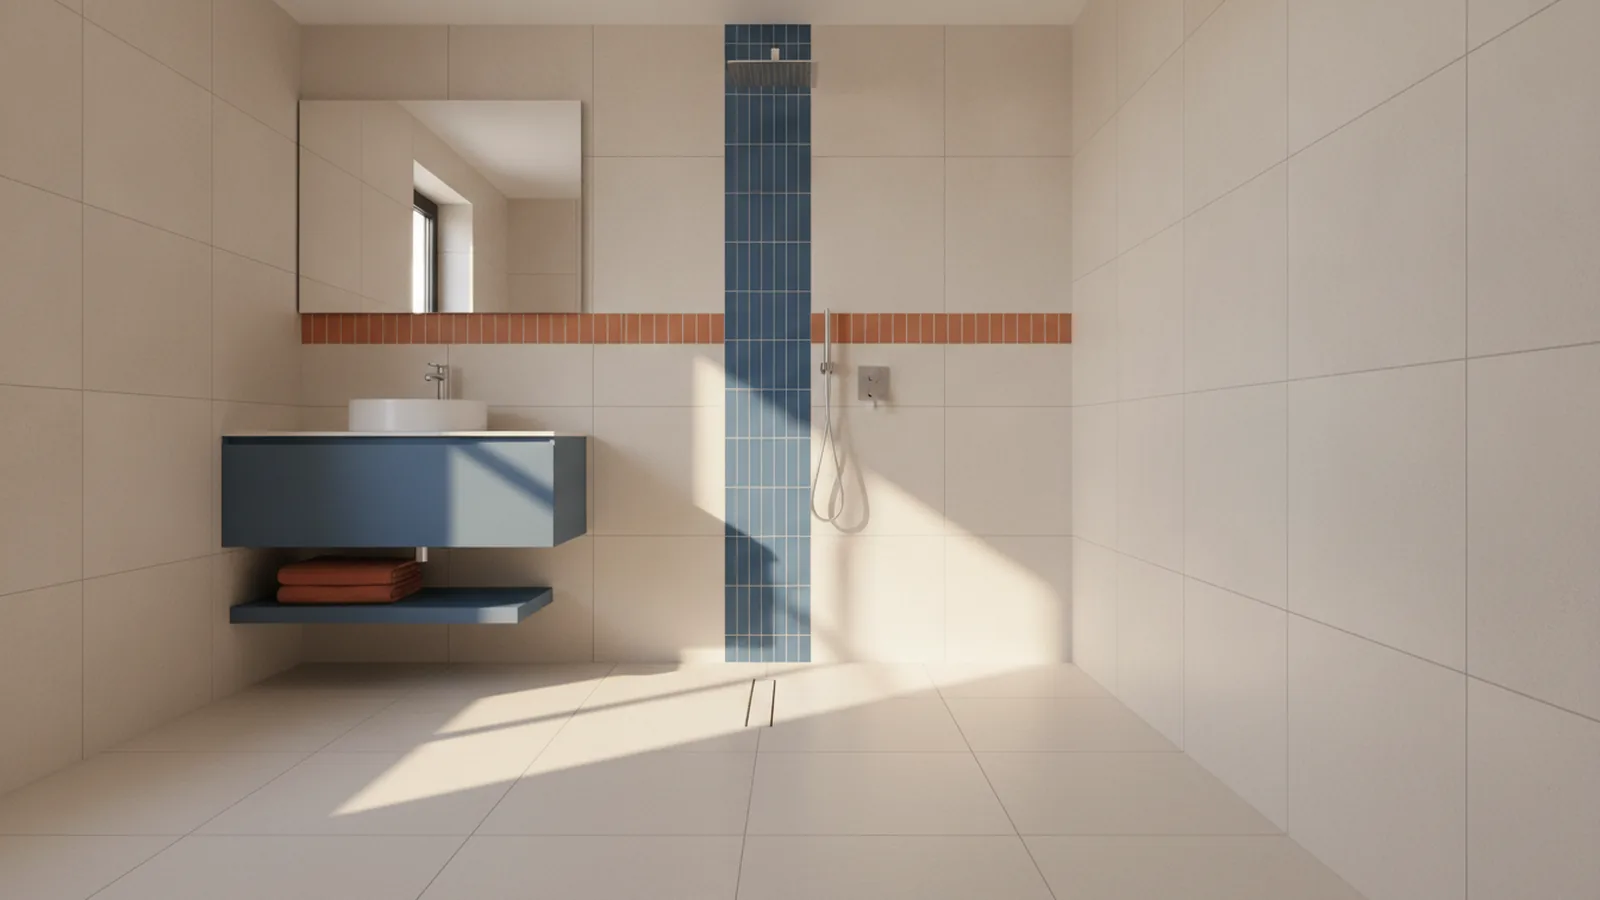
A wet room is a waterproof bathroom where the shower area sits level with the rest of the floor. Water then flows toward a drain instead of being contained by a raised tray. In most designs, the entire room feels like one continuous shower zone.
The key idea is floor drainage. Instead of relying on a curb, you rely on a correct slope and a sealed build-up. The result can be an open-concept design that feels spacious and simple to use.
Because the whole floor can get wet, the construction must be watertight. That means waterproofing over floors and up lower wall sections. It also means careful plumbing considerations around the drain and pipe runs.
Below are the practical parts you need to plan before you start building. You will see what to choose, how to stage the install, and how to keep the room working for years.

Benefits of a Wet Room
Wet rooms can maximize space, especially in smaller bathrooms. You remove the shower enclosure and often reduce visual clutter. Many owners also like the minimalist bathroom design feel of fewer parts.
Accessibility is another strong reason to choose a wet room. With a level floor, you can create an accessible bathroom layout that supports easier movement. This is especially helpful as mobility needs change over time.
Cleaning is also simpler. With an open layout, there are fewer nooks and grout-heavy edges typical of shower surrounds. When paired with good ventilation systems, the open design can support better hygiene.
- Space gain: no tray, no door, fewer partitions
- Better access: level entry and easier transfers
- Easier cleaning: wipe across one continuous area
- Hygiene support: less trapped moisture when venting is good
Planning Your Wet Room
If you are asking how to build a wet room bathroom, start with layout and drainage. Mark the future shower zone, then decide where your drain will sit. The drain position affects where you can slope the floor and how to route pipes.
Size matters for day-to-day function. A wet room should ideally be at least 35–40 square feet, so you have room to move and dry off without water landing everywhere. For very small bathrooms, plan for a tighter layout and expect a more limited circulation space.
Now think about the bathroom materials you will use. Pick non-porous, durable surfaces like porcelain tiles or stone that can handle constant moisture. Avoid materials that degrade when damp for long periods.
Also plan for safety. You need slip-resistant flooring, especially where you will stand while bathing. If you have children or older users, treat slip resistance as a core requirement, not an upgrade.
- Confirm drain location and check it matches your plumbing route.
- Measure the room and plan a minimum workable area of 35–40 square feet.
- Choose floor tile that is slip-resistant and moisture-safe.
- Plan ventilation so the room dries between uses.
- Decide the build-up thickness so you can achieve the right slope.

Key Elements of Wet Room Design
Three design elements drive whether your wet room stays dry below. Those elements are proper waterproofing, correct floor slope, and safe surface choice. If any one is wrong, the room can leak or feel unsafe.
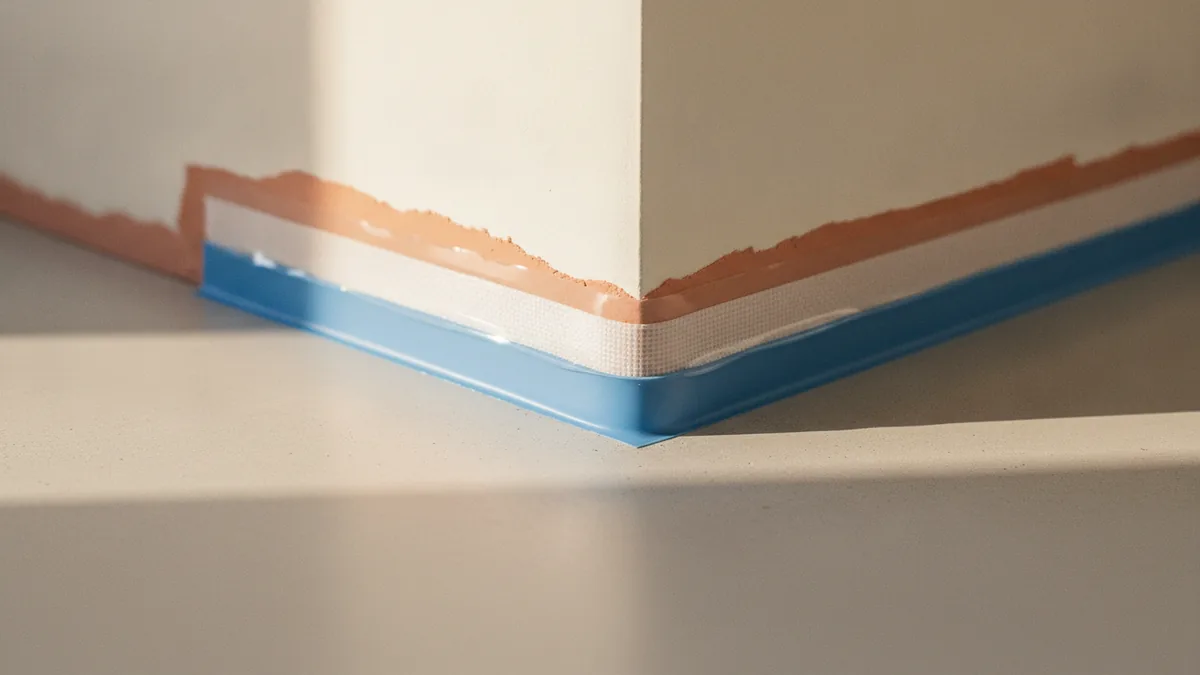
Waterproofing must be continuous. Install a waterproofing membrane over the floor and up the lower walls. Overlap seams carefully, and pay extra attention around the drain flange and any pipe penetrations.
The floor must slope correctly toward the drain. Without slope, water pools and stays on the surface longer than intended. A typical goal is a gradual slope that directs flow without making the floor feel uneven. Your contractor or spec sheet should guide the exact target for your build-up.
For durable bathroom materials, choose porcelain tiles or suitable stone with proper sealing only if the product requires it. Use thinset and grout systems designed for wet areas. Avoid “nice-looking” but high-absorption materials.
- Waterproofing: continuous membrane on floors and lower walls
- Floor drainage: sloped build-up to the central drain
- Slip resistance: wet-area rated tiles or finishes
- Plumbing considerations: sealed connections around the drain
Design also includes what you see. An open-concept design often uses a minimalist bathroom design approach, with fewer barriers. Keep finishes simple so you can dry and maintain them easily.
If you need accessible bathrooms, consider how users move and where they can hold support. Plan grab bar locations before tile so you can anchor correctly. Also review ADA compliance guidance where applicable for clear floor space and safe transfer zones.
Installation Process of a Wet Room
To learn how to build a wet room floor, think in stages. You build a watertight base, slope it for drainage, then finish with tiles and safe surfaces. Each stage depends on your subfloor type and your drainage plan.
First, decide how to build a wet room on concrete floor versus how to build a wet room on a wooden floor. Concrete and wood both can work, but the build-up and prep are different. Always follow the waterproofing system instructions and your local building rules.
How to build a wet room on concrete (sloped base + membrane)
If you are how to build a wet room on concrete floor, start by preparing the slab. Remove dust, loose material, and any coatings that stop bonding. Fix cracks or soft spots before you build the slope.
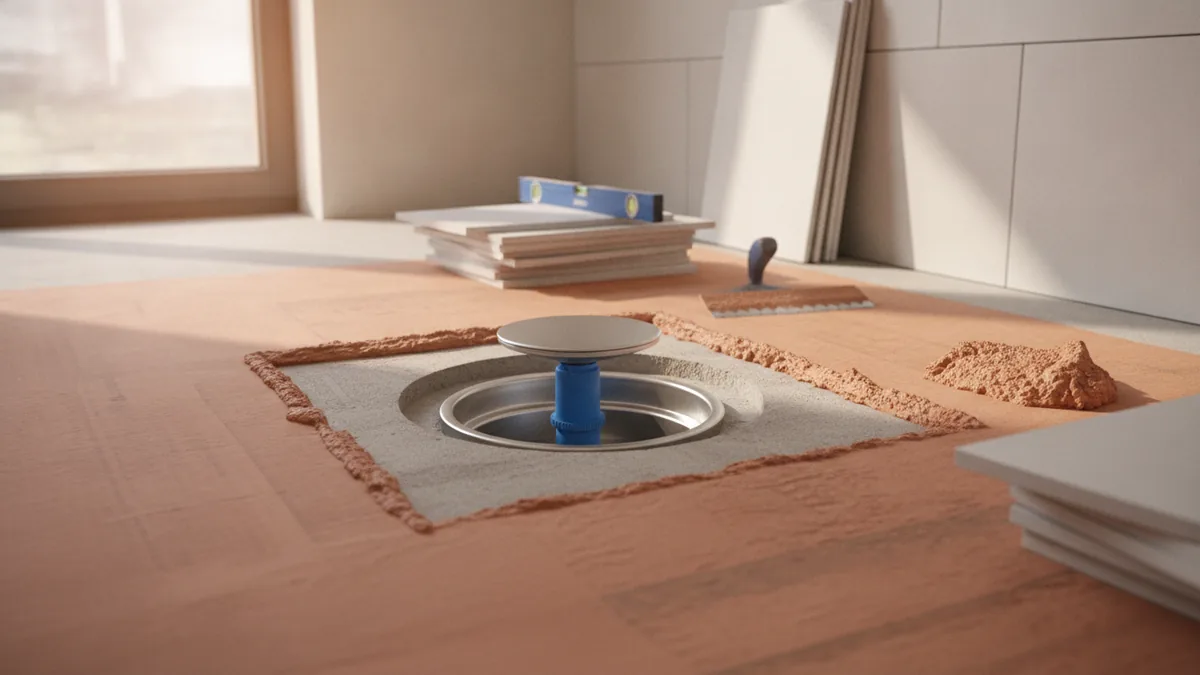
Next comes the sloped build-up. You can use a screed system or a compatible sloped panel system designed for wet rooms. The goal is steady drainage toward the drain, not a “good enough” tilt.
Then install the continuous waterproofing membrane. Cover the floor and lower walls, and seal all seams. Finally, fit the drain components so the membrane bonds correctly at the drain outlet.
As you tile, keep the finish aligned with the slope. This is when you confirm the wet room actually sheds water toward the drain. If you see low spots, correct them before the adhesive cures.
How to build a wet room on wood (support + waterproofing over movement)
If you are how to build a wet room on a wooden floor, begin with a structural check. A wet room can add weight from tile, mortar, and a sloped build-up. Your joists must support the added loads without excessive flex.
Then you prepare the wood surface to accept the wet-room system. That might include an underlayment board and a compatible waterproofing layer designed for movement. The membrane needs to stay intact as the floor flexes slightly.
Plan the slope carefully. With wood floors, you usually build up the slope with a wet-room rated system so you avoid weak transitions. Seal the substrate at all penetrations, especially around the drain.
When you move from waterproofing to tiling, avoid shortcuts with fast-drying adhesives meant for dry walls only. Use wet-area products rated for continuous moisture exposure.
How to install a wet room on concrete floor (typical workflow)
If you want a tighter view of how to install a wet room on concrete floor, use this workflow. It keeps the sequence logical and reduces the chance of missed waterproofing steps.
- Prep the slab: clean, repair cracks, and address damp issues.
- Build the slope: form the drain path with a rated screed.
- Fit the drain: install the outlet to match the membrane plan.
- Install waterproofing: membrane on floors and lower walls.
- Tile and grout: use wet-area systems, then cure fully.
- Test flow: confirm water moves toward the drain.
How to make a wet room on a wooden floor (typical workflow)
If you want how to make a wet room on a wooden floor, focus on support and sealing. A wood subfloor needs the right build-up to reduce movement stress on the membrane.
- Check structure: confirm stiffness for tile and build-up.
- Level and board: install wet-room rated base layers.
- Create the slope: use a system designed for wooden builds.
- Seal penetrations: protect around pipework and fasteners.
- Waterproof: continuous membrane to the planned height.
- Finish: tile with slip-resistant products and proper grout.
Throughout the build, keep the room ventilated and protect membranes from damage. A punctured membrane is harder to fix once tile is installed. Work carefully around corners, edges, and drain details.
Maintenance Tips for Wet Rooms
Wet rooms need maintenance and care, mainly focused on keeping water moving and keeping surfaces safe. You want routine cleaning that does not damage waterproofing or grout.
Start with daily habits. After showers, wipe standing water if you notice it linger. This reduces soap scum and helps keep slip-resistant tiles safer.
Use cleaning products that match your tile and grout type. Avoid harsh solvents that could break down sealants or coatings. If you are unsure, test a small hidden area first.
- Dry between uses: wipe puddles on heavy-traffic days
- Check the drain: remove hair and debris regularly
- Inspect grout lines: watch for cracking or gaps
- Maintain ventilation: run the fan during and after showers
Also watch for early leak signs. If you see damp ceilings below, investigate right away. Small problems become expensive when you only notice after months of water damage.
If you have an open-concept design, condensation can build faster on cool days. A good ventilation strategy helps your surfaces dry and supports hygiene.
Conclusion: Is a Wet Room Right for You?
A wet room is a strong choice when you want a level, open shower experience. It can deliver better accessibility, easier cleaning, and a clean look with fewer barriers. It also supports hygiene when ventilation is planned well.
That said, a wet room is only as good as its waterproofing and drainage. Proper slope and a continuous membrane protect the rest of the bathroom. Choosing slip-resistant, non-porous materials helps keep the room safe and durable.
When planning how to build a wet room bathroom, map your layout first and then build the floor correctly. If you are working with concrete, focus on slab prep and membrane continuity. If you are working with wood, focus on structure strength, the right build-up, and sealing at movement points.
If your goals match that level of build quality, you will likely love the result. Get the basics right, then maintain it with simple cleaning and drain care.
Frequently asked questions
- What is a wet room bathroom, and how does water drain?
- A wet room has a waterproof, level shower floor. Water flows across the floor toward a central drain.
- Do I need waterproofing for a wet room floor and walls?
- Yes. You need a continuous waterproofing membrane on the floor and up the lower walls to prevent leaks.
- How do I build a wet room floor with the right slope?
- You build the slope into the wet-room base so water naturally moves to the drain. Use a system rated for wet rooms rather than ad-hoc tilting.
- Can I build a wet room on a concrete floor and on a wooden floor?
- Yes. Concrete typically needs slab prep and a sloped screed build-up. Wooden floors require a structural check and a compatible waterproofing build designed for movement.
- What bathroom materials work best in a wet room?
- Choose non-porous, durable surfaces like porcelain tile or suitable stone. Use wet-area thinset and grout that handle constant moisture exposure.
- How do I maintain a wet room after installation?
- Keep the floor dry when needed, clear debris from the drain, and inspect grout lines over time. Run ventilation during and after showers to reduce dampness.
Related reading
Kitchen Renovation Costs — Price Ranges and Budget Factors
See typical kitchen remodel prices, key cost drivers, and ways to keep your budget on track.

Large Living Room Walls — Scale, Style, and Warmth
Use scale, art, texture, shelves, and light to make a large wall feel balanced.

High Ceilings — Warmth, Scale and Style
Use color, scale and soft textures to make tall rooms feel inviting.